Showing posts with label project life. Show all posts

Sunday, June 7, 2015

Documenting Disney

One of the projects I vowed to work on at the retreat last month was my Disney photos.  We've been going on and off for the last 8 years.  We only live 20 minutes from the CA location and whenever we visit my in-laws in Orlando, we stop in there.  It helps that my Father in Law is a Disney employee.  He chose to work there to supplement retirement income when they moved and retired down there.  Works for us!  (Have you SEEN the admission prices these days?)

Anyway, I took both Simple Stories themed lines, 8 years of photos and all the memorabilia I had saved up.  I never planned to document Disney because I don't use the overly themed papers available.  I was thinking I could get a Snapfish photo album done one of these days.  Until Simple Stories released these lines.  OMG how cute are the Disney lines now?  I love that they are themed but also generic.  The colors match everything because they're basic.  I love it. (Say Cheese I and II)

I started the album using a class kit from Layle Koncar.  She used to work for Scenic Route and Basic Grey but now she works for Simple Stories.  Her style is perfect and I love her classes.  Since I couldn't be physically present, it was awesome of the store holding the class to sell extra kits.  I was able to get my hands on one and it was the *perfect* jump start for this album.

 A red American Crafts cloth album altered with the Simple Stories papers and items from the sets.
 Page 1 - Part of the class kit from Layle.  I made a few minor changes.
 Back of page 1.  I like how she altered (cut) the size of this first page down to 3 4x6 slots.  There are small details like this throughout her kit/class that make the album fun.
Page 3 is actually a 12x12 layout.
 Page 4 is another layout designed by Layle.  Super simple but perfect for those one off photos that I don't want to try and fit into the pocket style.
 And here is where I veered off on my own.  I used the same pocket pages that Layle used but my own designs and cards.  Like I said, her pages were the perfect start to this album and they got me in the mood to do this.  Its going to be a major undertaking.  (These first pages are all from my sons first time at DL.  He was barely 9 months.  His favorite ride was the teacups.)
 Or maybe it was the Jungle Cruise.  Nope, the teacups.
 By this point, I was having too much fun mixing and matching.  I wish I had a photo of my table at the crop.  My entire 6 foot table was covered in the product line.

I even snuck in some flair from the A Flair For Buttons Easy shop.  Shelly designed some basic Mouse Words flair.

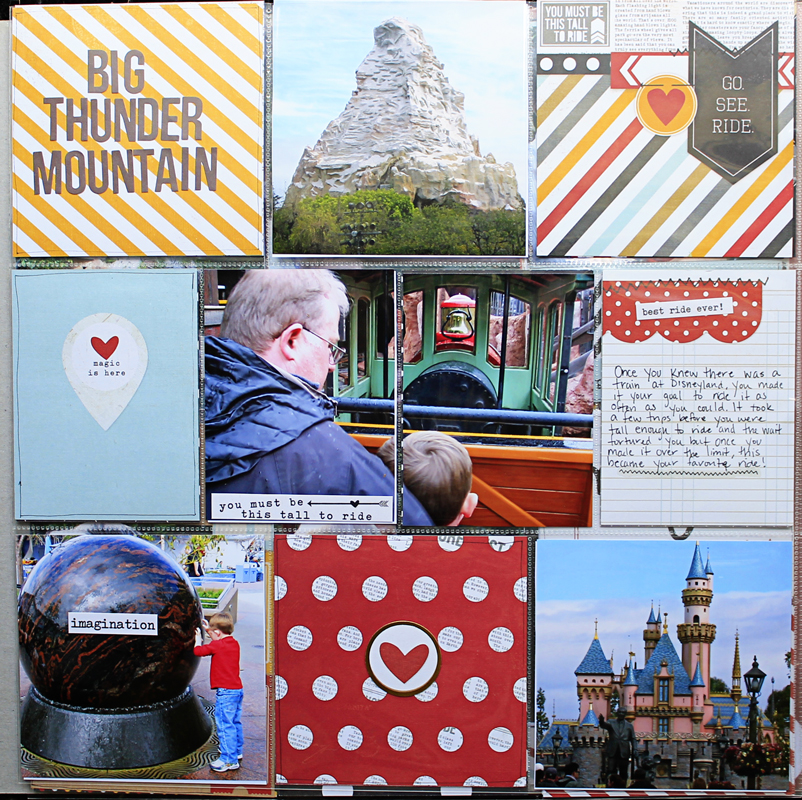
 The next time we went, he was a little older and could ride more of the big kid rides.  While I love Dumbo, Peter Pan etc, there are some fun rides that have height requirements. (The last time we went, he was finally tall enough for the last ride - Indiana Jones!)
 I love throwing memorabilia in there.  I realize now, that I stuck this in the wrong spot.  The next section was his first trip to Florida.  I think I switched the maps.  :)


A tip for anyone doing this kind of album and its not a new trick that I invented, just something I do.  When all but 1-2 of my photos work for a specific pocket layout, or if I particularly like that pocket layout, I go with it.  I make my photos work.  This last page (and some others above) have a split photo.  I really didn't plan this album out - its strictly on a whim.  So when I printed out photos before the retreat, I went with 4x6's and either cut them down to fit pockets or split them.  It works.  It doesn't disrupt the flow of the photo either.

** all products are from Simple Stories.  I purchased mine at either Scrapbook.com or ACherryontop.com.  Sticker letters are all Simple Stories.  I'm addicted to their sticker letters and they come in ALL colors.  I buy them whenever there is a coupon and have at least a 6 inch stack of them.  Sadly the local stores to me do not carry these lines so I did order them online.  If your local store carries them, I envy you.  Simple Stories is one of my favorite brands and they are hard to find in my area.***

Sunday, December 1, 2013

Project Life - Coming from Behind

So, I just finished February.  I realize November is over but I said I would stick with the project this year and I have.

February is done and March is in the works.  Aprils pictures are on their way from Persnickety Prints.  At the rate I'm going I could be caught up by the end of the year!

Just wanted to share the pages for February/March before I forget.

 These are a mix of products on hand and the Studio Calico PL kits.  I have a few months of kits before I cut that subscription.
 Sequins.  I have some in every color and this might be the first I've used.  I'm planning on changing that.
 Washi tape.  I sold off most of it last month but kept the stuff that I really like.  The aqua and yellow chevron were perfect.  This seahorse was my son's favorite animal as a baby.  Its the new Glo Worm I guess.  The Glo Worm was discontinued due to safety hazards.  We had three of these seahorses because he needed one wherever he went.  We lost one and at one point, we thought he'd never nap again.  After a late night trip to Target we found one.  Actually 3 of them and bought all 3.  He had one at home, one at grandma's and one at daycare for nap time.

When I found this tucked under his bed I almost cried.  He's not a little baby anymore.
 Hockey practice.
 Using another dusty tool.  My Silhouette.  I cut the US and Canada maps from kraft cardstock, using Studio Calico veneer stars and some solid Baker's Twine to draw our flight patch for the trip to Calgary.  I used all plain 4x6 PL cards along with tags from Chic Tags.


 He really said that too.  A little backstory.  A year prior, we took my son to Canada for the first time.  He couldn't skate.  A poor California boy with a new pair of skates and a desire to learn.  Cousin Bryce helped us out and got him going.  A year later, the student returns to Calgary and challenges the teacher.  The teacher couldn't keep up with him as they whizzed around the outdoor rink.
 Driving to Banff.  Probably the one place I'll miss the most now that my dad is home.  More Chic Tags.


 Crave Cupcakes.  My favorite.  Some of the*best* frosting every.  Said that they are only in Canada.
 Valentines Day.  We went out to dinner at Farrell's Ice Cream Parlor and then home.  G&G gave you the annual See's Candy box (a 60 year tradition).  Then you got to play with your new lego set.


 Once I finished February, I promised myself to take it easy going forward.  I think I overthink PL and try to get creative.  I've got three PL kits on top of all the extras I've bought (Studio Calico kits, PL mini kits, Elle's Studio tags, Chic Tags etc).  I'll never be able to use it all up.  I will be clearing out the overstock at some point and selling that off.
 Some of my new favorite letters - SN@P letters from Simple Stories.

Elise Blaha PL kit.  LOVED the colors and patterns in this one.  Had to have it but never opened it until now.

Tuesday, May 21, 2013

Love for Picasa

I started Project Life last year and loved doing it.  After a few weeks the picture editing and printing got to be too much.  I bought a Canon Selphy but the quality was less than what I hoped for even for the project.

I gave up after 19 weeks because it was so difficult to get a true 3x4 photo printed without jumping through hoops for the programs that did offer it.  I gave up.  It just wasn't worth the hassle.  I researched different programs and options but nothing worked easily.  Or it wasn't compatible with a Mac.

I decided to do PL again this year but instead of a weekly 2 page spread, I focused more on the monthly type layouts.  I will not take 30 pictures each week and try to fit as many as I can in.  And with Picasa, I can get the true 3x4 printed 2-up on a 4x6 sheet of photo paper.  I read on a message board that Picasa has a template.  They sure do!

Took me 10 minutes to select the photos, upload them to Picasa and then print them.  I'm actually excited to work on my PL again and I love my monthly spread so much better!

A quick tutorial:


STEP 1:  Once you've downloaded Picasa, the program will import all of the photos on your computer.  (I have a Mac so my screen might look different than yours.)  I already have all of my photos sorted in folders the way *I* like them so I just ignore the folders in Picasa.  I have a Project Life folder for each month.  As I take photos with my camera or phone, I upload them here for end of the month editing.

STEP 2: Select two photos that you want to import to the 4x6 canvas.  To make things easier, I use the flip tool at the bottom to flip my pictures to the same orientation.  Hold your shift key down and click on each photo with your mouse.

STEP 3: Click the 'Create Collage' button.  You'll get the preview below.  This is where you can edit the photos as well.

STEP 4: Click the 'export' button to save the photo to a folder on your computer.

STEP 5: Save the photo and print!  I use my Canon Pixma to print once I've got all of the collages saved.

Final product looks like this:


 You can upload these to any online processor if you don't have print at home capabilities.

January PL Pages


And since there are virtually NO purple products out there I had to make my own.  Luckily, I didn't have to look too far.  Studio Calico just released a limited edition set of mini Mister Hueys which included this cool purple.  Now, the Kings don't have purple in their jersey/logo anymore but they will always in my mind.  Plus, these pages needed a pop of color.  I stuck with black/silver and white throughout and added the purple.  The hearts and stars are from Pink Paislee and the sticker letters are from Basic Grey.  I used some black and white ones (tinted purple).

To get the purple letters I used a small paint brush and dipped it into an open Mister Huey.  I used several coats to make sure I got the color I wanted.  I also have about 10 sheets of this font because I like to keep white on hand for projects like this.  If you use mists or any other water based color agent, you'll want to let the letters dry for a few hours.  Using them while they're went will cause them to rip.  Avoid using a heat tool to dry them quicker.  This seems to melt the adhesive.  I've attempted this several times and figured out the best way to do this.  Not all sticker letters will be the same but with these BG ones, this is the best method.  Air dry works best.  For this project, I laid everything out, planned my page and then colored the letters I needed.  While they were drying, I was washi taping, gluing and decorating the 4x6 cards.  The last step was adhering the dry mini letters.

Wednesday, December 26, 2012

Satisfying

That is how that little blogging break felt.  I love sharing and documenting here but I needed the break. I needed to know that there was one less thing that needed my attention for just a bit.  I needed to enjoy December before it passed me by.

And I did.  I enjoyed planning for the holidays and spending time with the men in my life.  My camera card is almost FULL with the pictures I've taken this month.  Thats awesome but I have a lot of sorting to do.

There has been minimal crafting but thats about to change.  I've made a resolution for 2013 already.  I realize now that I do not and will not have the time or energy to scrapbook as much as I have in the past.  I started to feel the pressure to use everything I bought and then it ends up sitting.  I have so much stuff.  Its ridiculous how much I have and that prompted a small purge of the room.  Mostly paper and a few embellishments.  I'll be listing flat rate boxes again for anyone interested.  I will also be participating in Project Life again this year.  I did 19 weeks last year before I bowed out gracefully because it was too much work.

Not this year.  I'm renewed and I have a new plan.  I'm also not going to try and 'get caught up' with older pictures.  I've got baby pictures of N that I feel I will never get around to scrapping.  I told my husband the only thing I wanted for Christmas was:


They were under the tree for me this Christmas and I felt a HUGE weight lifted off my shoulders.  Photos of  my son make up 80% of the photos I've taken since 2007.  I added in some of the WRMK albums from Michaels to document.  I'm not worried about getting this done as I've been good about keeping the photos in folders by year, month and event.  Most of them have been printed out so now its just a matter of adding them to the divided pages.  Its one of those projects that I can take anywhere and work on.  No packing up my entire room to work on something.

It also seems like I'll be spending more time at the rink in 2013 and this will be perfect for those days.  Give me something to do other than be 'that' Hockey Mom.  ;)

My other resolution for 2013 is to document more here.  

I've got plans for posts through New Years so check back.  I've got a lot more to share!